In this tutorial, we will be setting up an automated deployment of a dockerized WordPress website on a remote server. The server is running multiple other websites that are managed by nginx-proxy Along this reverse proxy, the server is running a Let’s Encrypt proxy companion that automatically provisions websites with Let’s Encrypt certificates. The deployment automation will be done with Gitlab CI /CD.
Table of Contents
Prerequisites
We will need a remote Linux-based server with Docker and docker-compose installed. Additionally, you have to set up nginx-proxy and letsencrypt-proxy-companion as described in their documentation or in this post: Use Nginx-Proxy and LetsEncrypt Companion to Host Multiple Websites.
You will need a GitLab account.
We also assume that you have an existing blog and have a database dump for it. If not, just keep the db_dump directory mentioned below empty.
Local Setup
Before moving to the actual deployment, let’s set up the planned WordPress infrastructure to work locally.
We start with creating a project directory for our blog:
mkdir my_blog
cd my_blog
In this directory, we create the file called docker-compose-local.yml. In this file, we will define 3 services:
- db_blog – implements a MySQL server
- wp_blog – runs the WordPress web application
- web_blog – an nginx reverse proxy put in front of WordPress for faster static file delivery. Note: it is not the nginx-proxy that we will use in the live environment.
The file docker-compose-local.yml defines the db_blog service like this:
version: "3"

services:
  db_blog:
    image: mysql:8.0
    container_name: db_blog
    restart: unless-stopped
    env_file: .env
    environment:
      MYSQL_ROOT_PASSWORD: $MYSQL_ROOT_PASSWORD
      MYSQL_USER: $MYSQL_USER
      MYSQL_PASSWORD: $MYSQL_PASSWORD
      MYSQL_DATABASE: $DB_NAME
    ports:
      - 42333:3306
    volumes:
      - dbdata:/var/lib/mysql
      - ./db_dump:/docker-entrypoint-initdb.d
    command: '--default-authentication-plugin=mysql_native_password'
    networks:
      - app-network
There are several points to note here:
The db_blog service maps the host’s port 42333 to its MySQL port 3306 so that we can connect a MySQL client (e.g., MySQL Workbench) to the database:
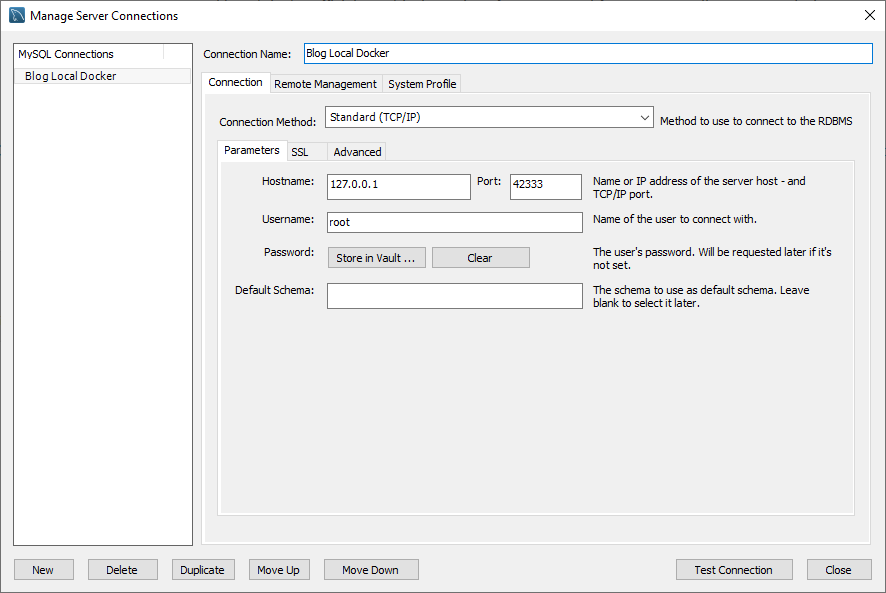
To connect successfully to this local database server instance, make sure that the MySQL Workbench does not try to use SSL for this connection:

- The service uses an
.envfile. This is a file that we will have to create in the project directory and exclude from the repository using.gitignore. In the local setup, the values for the environment variables can be, for example, these:
MYSQL_ROOT_PASSWORD=password
MYSQL_USER=db_admin
MYSQL_PASSWORD=password
DB_NAME=my_blog_db
- The db_blog service binds a local directory
db_dumpas a volume/docker-entrypoint-initdb.d. Any.sql,.sql.gz, or.shfile placed in this directory will be run when the container is created. We will put our database dump filemy_blog_db_dump.sqlthere. Additionally, we will place a small SQL scriptz_update.sqlwith this content:
update wp_options set option_value = "http://localhost:8080" where option_name in ('siteurl', 'home')
This file will be run after the database dump is imported and will set up blog options to use the locahost URL.
Naturally, we will exclude the db_dump directory and any .sql and .sql.gz files from the repository.
- Finally, note that the db_blog service uses the
app-networkthat will connect all three services.
The next service is the WordPress host wp_blog. It is defined like this:
  wp_blog:
    depends_on:
      - db_blog
    image: wordpress:5.4.1-fpm-alpine
    container_name: wp_blog
    restart: unless-stopped
    env_file: .env
    environment:
      WORDPRESS_DB_HOST: db_blog:3306
      WORDPRESS_DB_USER: $MYSQL_USER
      WORDPRESS_DB_PASSWORD: $MYSQL_PASSWORD
      WORDPRESS_DB_NAME: $DB_NAME
    volumes:
      - wordpress:/var/www/html
      - ./wp-content/uploads:/var/www/html/wp-content/uploads
      - ./wp-content/themes/beonepage:/var/www/html/wp-content/themes/beonepage
      - ./wp-content/plugins:/var/www/html/wp-content/plugins
    networks:
      - app-network
This service also uses the .env file to read the values of the environment variables. It defines a wordpress volume that will be shared with the reverse proxy service.
Other volumes contain directories with files that do not belong to the WordPress image:
./wp-content/uploads– there we will have files that are uploaded via the WordPress backend. They will not belong to the repository and we exclude the directory./wp-content/uploadsin.gitignore../wp-content/themes/beonepage– this directory of your custom page. For this example, I’ve chosen a simple free theme beonepage, but you can use any other ready theme or build a custom one../wp-content/plugins– plugins are custom content too. Put here whatever plugins you need for your blog. These files can be included in the repository as well.
The web_blog service definition is this:
  web_blog:
    depends_on:
      - wp_blog
    image: nginx:1.15.12-alpine
    container_name: web_blog
    restart: unless-stopped
    ports:
      - "8080:80"
    volumes:
      - wordpress:/var/www/html
      - ./wp-content/uploads:/var/www/html/wp-content/uploads
      - ./wp-content/themes/beonepage:/var/www/html/wp-content/themes/beonepage
      - ./wp-content/plugins:/var/www/html/wp-content/plugins
      - ./nginx-conf:/etc/nginx/conf.d
    networks:
      - app-network
This service maps its port 80 to the host’s port 8080. This will make the WordPress blog available at URL http://localhost:8080.
The service web_blog uses the same volumes as the wp_blog service and additionally, binds a directory containing the Nginx configuration: ./nginx-conf. The nginx.conf file there has this content:
server {
        listen 80;
        listen [::]:80;

        index index.php index.html index.htm;

        root /var/www/html;

        location / {
            try_files $uri $uri/ /index.php$is_args$args;
        }

        location ~ \.php$ {
            try_files $uri =404;
            fastcgi_split_path_info ^(.+\.php)(/.+)$;
            fastcgi_pass wp_blog:9000;
            fastcgi_index index.php;
            include fastcgi_params;
            fastcgi_param SCRIPT_FILENAME $document_root$fastcgi_script_name;
            fastcgi_param SERVER_NAME $host;
            fastcgi_param PATH_INFO $fastcgi_path_info;
        }

        location ~ /\.ht {
            deny all;
        }

        location = /favicon.ico {
            log_not_found off; access_log off;
        }

        location = /robots.txt {
            log_not_found off; access_log off; allow all;
        }

        location ~* \.(css|gif|ico|jpeg|jpg|js|png)$ {
            expires max;
            log_not_found off;
        }
}
Our project also contains an entry point script in file docker-entrypoint.sh. The WordPress container copies the file under this name when it’s created and runs it once. We use this script to make the uploads directory writable for the webserver user that runs WordPress:
#!/bin/sh

echo "Waiting for mounts..."

while ! ls /var/www/html; do
  sleep 0.1
done

echo "Volumes mounted"

chown -R www-data:www-data /var/www/html/wp-content/uploads
Since the uploads folder is a volume we need to wait until volume mounting is done. The waiting is implemented in a loop.
Next, let’s take a look at the .gitignore file:
.env
*.sql
*.sql.gz
./db_dump/
wp-content/uploads/*
Add to the file docker-compose-local.yml the definitions of volumes and networks:
volumes:
  dbdata:
  wordpress:

networks:
  app-network:
    driver: bridge
The current content of the file docker-compose-local.yml is this:
version: "3"

services:
  db_blog:
    image: mysql:8.0
    container_name: db_blog
    restart: unless-stopped
    env_file: .env
    environment:
      MYSQL_ROOT_PASSWORD: $MYSQL_ROOT_PASSWORD
      MYSQL_USER: $MYSQL_USER
      MYSQL_PASSWORD: $MYSQL_PASSWORD
      MYSQL_DATABASE: $DB_NAME
    ports:
      - 42333:3306
    volumes:
      - dbdata:/var/lib/mysql
      - ./db_dump:/docker-entrypoint-initdb.d
    command: '--default-authentication-plugin=mysql_native_password'
    networks:
      - app-network

  wp_blog:
    depends_on:
      - db_blog
    image: wordpress:5.4.1-fpm-alpine
    container_name: wp_blog
    restart: unless-stopped
    env_file: .env
    environment:
      WORDPRESS_DB_HOST: db_blog:3306
      WORDPRESS_DB_USER: $MYSQL_USER
      WORDPRESS_DB_PASSWORD: $MYSQL_PASSWORD
      WORDPRESS_DB_NAME: $DB_NAME
    volumes:
      - wordpress:/var/www/html
      - ./wp-content/uploads:/var/www/html/wp-content/uploads
      - ./wp-content/themes/beonepage:/var/www/html/wp-content/themes/beonepage
      - ./wp-content/plugins:/var/www/html/wp-content/plugins
    networks:
      - app-network

  web_blog:
    depends_on:
      - wp_blog
    image: nginx:1.15.12-alpine
    container_name: web_blog
    restart: unless-stopped
    ports:
      - "8080:80"
    volumes:
      - wordpress:/var/www/html
      - ./wp-content/uploads:/var/www/html/wp-content/uploads
      - ./wp-content/themes/beonepage:/var/www/html/wp-content/themes/beonepage
      - ./wp-content/plugins:/var/www/html/wp-content/plugins
      - ./nginx-conf:/etc/nginx/conf.d
    networks:
      - app-network

volumes:
  dbdata:
  wordpress:

networks:
  app-network:
    driver: bridge
At this stage, the project structure looks like this:
├── my_blog
│ ├── db_dump
│ │ ├── my_blog_db_dump.sql
│ │ ├── z_update.sql
│ ├── nginx-conf
│ │ ├── nginx.conf
│ ├── wp-content
│ ├── plugins
│ │ ├── akismet
│ │ ├── wp-mail-smtp
│ ├── themes
│ │ ├── beonepage
│ ├── .env
│ ├── .gitignore
│ ├── docker-compose-local.yml
│ ├── docker-entrypoint.sh
Note that our blog uses the WP Mail SMTP plugin. The official WordPress image does not provide mail-sending tools. WP Mail SMTP fills this gap. There is one small caveat in its setup that we will discuss below.
Local Test
We are now ready to run the local setup. From the project directory run:
docker-compose -f ./docker-compose-local.yml up -d
Depending on the size of the database dump, it may take some time until the db_blog service is ready to accept connections. You can check its status by observing the logs:
docker-compose -f ./docker-compose-local.yml logs -f db_blog
Wait a few seconds until the log output produces a line that contains [Server] /usr/sbin/mysqld: ready for connections.
If everything was fine, you should be greeting with your blog’s front page when entering http://localhost:8080 into your browser.
In case of any problem, inspect the status of the containers using docker-compose -f ./docker-compose-local.yml ps or the logs of the respective service.
WP Mail SMTP Docker Problem
Now to a problem that may happen when you are using the WP Mail SMTP in a setup with a reverse proxy (like this one).
After you have entered the proper settings into the plugin’s configuration, you should go ahead and send a test email using the options the plugin provides:
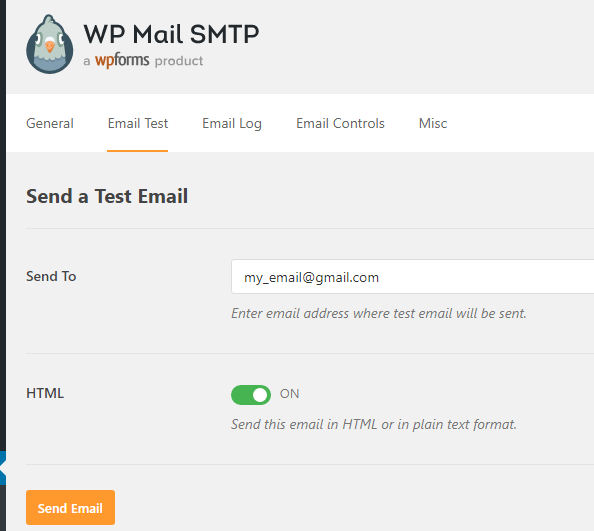
It may happen, that the test sending does not work even though you’ve triple-checked all the settings and tested them elsewhere. If you try to dig into the plugin’s code and output the content of the $this->debug['smtp_debug'] value in file wp-mail-smtp/src/Admin/Pages/TestTab.php, line 200 (right after the script attempts to send the test email) you will see an ambiguous line:
Invalid address: (setFrom) wordpress@
It appears that WordPress attempts to generate a “from” address for the email and fails to produce a valid email address. The reason is that the function that does this relies upon the $_SERVER[‘SERVER_NAME’]. This variable is not set unless the reverse proxy passes it. It is easy to miss it when writing the reverse-proxy config from scratch. But it is present in our config file /nginx-config/nginx.config:
fastcgi_param SERVER_NAME $host;
Enabling Cron Database Backup
We need one more feature added to our WordPress application – automated database backup.
We are going to add a cronjob that will back the database file every day at 6:00. To avoid overfilling of the backup directory, we will automatically delete backup files that are older than 5 days.
For this purpose, we add a new service, cron_blog. This is a simple container based on the Alpine image. In the file docker-compose-local.yml, we define it like this:
  cron_blog:
    depends_on:
      - db_blog
    build:
      context: ./
      dockerfile: Dockerfile_cron
    entrypoint: ['/var/scripts/cron_entrypoint.sh']
    restart: unless-stopped
    env_file: .env
    volumes:
      - ./db_backup_daily:/var/backup/db
    networks:
      - app-network
This container depends on the database service db_blog. We also create a volume to store the created backup files.
The Dockerfile_cron file content is this:
FROM alpine:3.11.6
RUN apk update && \
    apk add mariadb-client
COPY ./crontab /etc/crontab
RUN crontab /etc/crontab
RUN touch /var/log/cron.log
COPY ./cron_entrypoint.sh ./var/scripts/
COPY ./script_templates/db_backup.sh /var/scripts/
RUN chmod +x /var/scripts/cron_entrypoint.sh
RUN chmod +x /var/scripts/db_backup.sh
We need to add the mariadb-client Alpine package that will provide the mysqldump command. We also enable a cron job that will execute the backup. This cron job is defined in the file called crontab:
0 6 * * * sh /var/scripts/db_backup.sh >/dev/null 2>&1
The script db_backup.sh is copied from the directory script-templates. This file contains several placeholder values for parameters used to connect to the database service:
#!/bin/sh

backDatabase() {
    echo "backing up $3"
    mysqldump -h db_blog -u$1 -p$2 $3 > $4/$3-$5.sql
    gzip -f $4/$3-$5.sql
}

echo "start backup"

database=$DB_NAME
user=$MYSQL_USER
password=$MYSQL_PASSWORD
backupPath="/var/backup/db"

echo "deleting files older than 5 days"
find ${backupPath} -type f -mtime +5 -exec rm  {} \;

backDatabase ${user} ${password} ${database} ${backupPath} $(date +"%m-%d-%y")
The placeholders $DB_NAME, $MYSQL_USER, $MYSQL_PASSWORD will be replaced with values from the environment variables when the container is created. This script runs the mysqldump command that connects to the db_blog service and creates a dump file in the specified directory. It also deletes files older than 5 days to prevent the overfilling of the dump location.
The file Dockerfile_cron will also copy file cron_entrypoint.sh to the container.
#!/bin/sh

sed -i -e 's/$DB_NAME/'"$DB_NAME"'/g' /var/scripts/db_backup.sh
sed -i -e 's/$MYSQL_USER/'"$MYSQL_USER"'/g' /var/scripts/db_backup.sh
sed -i -e 's/$MYSQL_PASSWORD/'"$MYSQL_PASSWORD"'/g' /var/scripts/db_backup.sh

crond -f
This script will replace placeholder values in the db_backup.sh and start the cron daemon in the foreground (all log messages will be sent to stderr and visible to docker-compose logs).
Run the command docker-compose -f .\docker-compose-local.yml up -d again to create and start the cron_blog service.
Remote Deploy With Gitlab
By now our project directory and file structure look like this:
├── my_blog
│ ├── db_backup_daily
│ ├── db_dump
│ │ ├── my_blog_db_dump.sql
│ │ ├── z_update.sql
│ ├── nginx-conf
│ │ ├── nginx.conf
│ ├── wp-content
│ ├── plugins
│ │ ├── akismet
│ │ ├── wp-mail-smtp
│ ├── themes
│ │ ├── beonepage
│ ├── .env
│ ├── .gitignore
│ ├── cron_entrypoint.sh
│ ├── crontab
│ ├── docker-compose-local.yml
│ ├── docker-entrypoint.sh
│ ├── Docerfile_cron
Unless you’ve done it already, initialize a git repository, add all the files to it and make an initial commit:
git init
git add .
git commit -m "initial commit"
Now, let’s go to GitLab and log into your account (create a new one if you never used GitLab before).
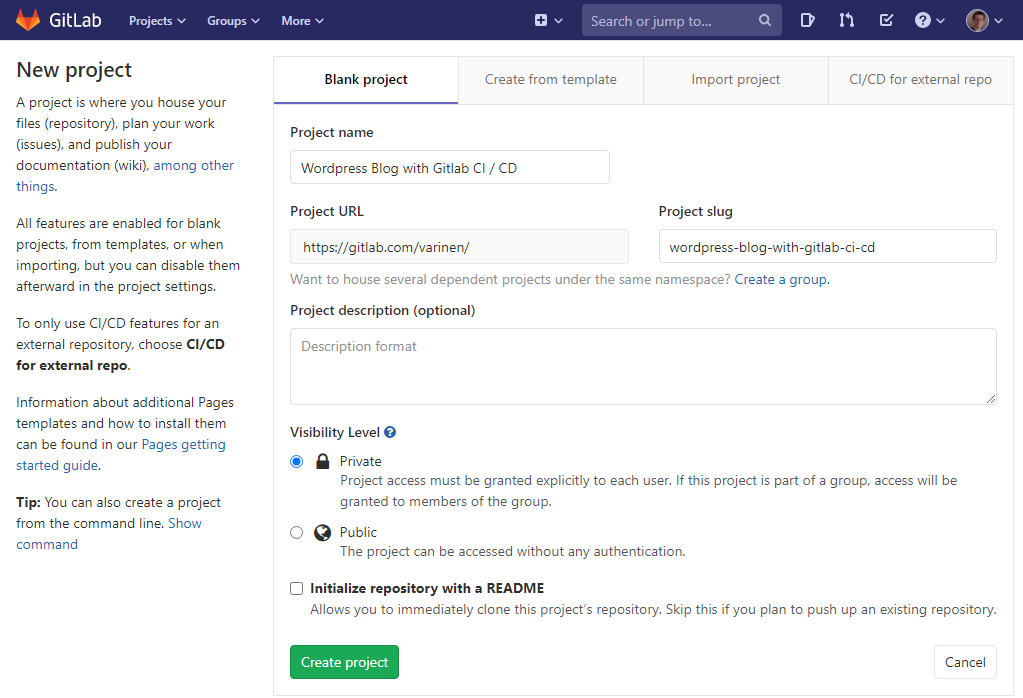
Go to “Your projects” and create a new project. Give it a name you want and click “Create project”:
Now let’s return back to our local project directory and add the created GitLab repository as the remote origin:
git remote add origin git@gitlab.com:varinen/wordpress-blog-with-gitlab-ci-cd.git
git push -u origin --all
Substitute the repository address git@gitlab.com:varinen/wordpress-blog-with-gitlab-ci-cd.git with your own. Now, we can push our changes to GitLab. We will set up the automated build and deploy pipeline to start when new content is pushed to the branch master:
git push -u origin master
Planning the Deployment
The process we are going to implement will comprise two stages:
- Release – In this stage, we will prepare to release images for our services.
- Deploy – In this stage, a script will run on the remote server pulling the latest versions of the images. The script will also stop, recreate, and restart the service containers.
We start by creating a file called .gitlab-ci.yml. At the top of the file, we define the variables we are going to use in the build and deployment:
image: docker:stable

variables:
  IMAGE: ${CI_REGISTRY}/${CI_PROJECT_NAMESPACE}/${CI_PROJECT_NAME}
  APP_PATH: ${INSTALLATION_PATH}/${CI_REGISTRY}/${CI_PROJECT_PATH}
  BACKUP_TARGET: ${INSTALLATION_PATH}/${CI_REGISTRY}/${CI_PROJECT_PATH}/db_backup_daily

stages:
  - release
  - deploy
The variables section will combine project variables to define:
- IMAGE – the prefix to the names of the service images that we are going to build.
- APP_PATH – the location of the website project files on the remote server
- BACKUP_TARGET – the location where the cron service will put the database backups.
Project variables prefixed CI_ are supplied automatically by GitLab. In my case, they will be:
${CI_REGISTRY}=registry.gitlab.com${CI_PROJECT_NAMESPACE}=varinen${CI_PROJECT_NAME}=wordpress-blog-with-gitlab-ci-cd${CI_PROJECT_PATH}=varinen/wordpress-blog-with-gitlab-ci-cd
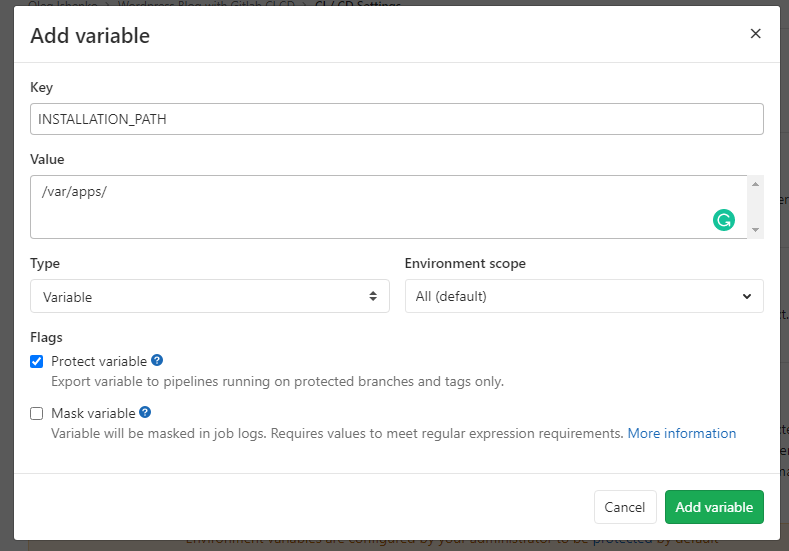
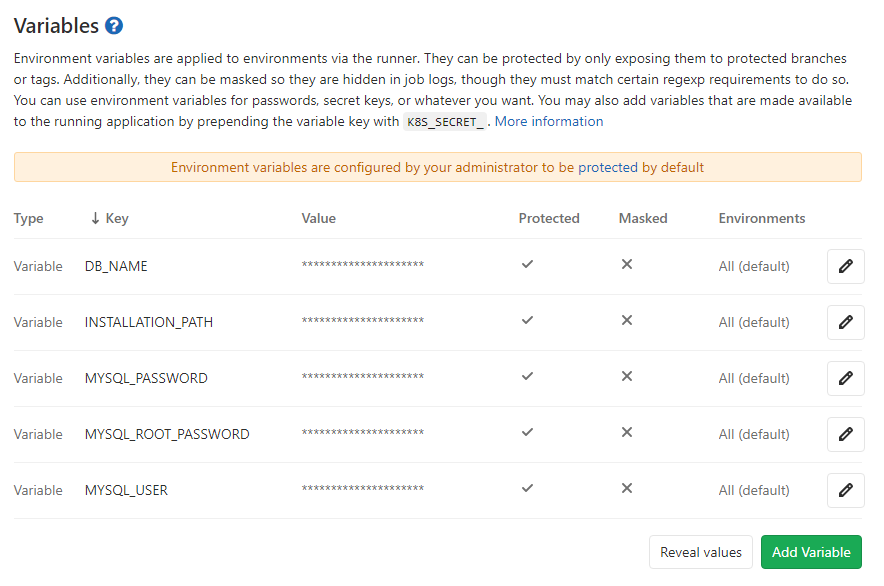
Other variables we will have to set up in the project settings. Go to “Settings” / “CI/CD” and expand the “Variables” section. There, create a variable called INSTALLATION_PATH. In my case, I am going to install my dockerized apps at /var/apps:
We will also have to set up all the environment variables that we used locally in the .env file:
DB_NAME–my_blog_dbMYSQL_ROOT_PASSWORD–secret_live_db_root_pwd(or something else)MYSQL_PASSWORD–secret_live_db_user_pwd(or something else)MYSQL_USER– ‘dbblog`
Later in this chapter, we will add a few more variables, but now, the list will look like this:
Release Stage
In this stage, we define how the service images are built. We add the following to the file .gitlab-ci.yml:
build:production:
  stage: release
  services:
    - docker:dind
  variables:
    DOCKER_DRIVER: overlay2
  script:
    - apk add --no-cache curl
    - docker login -u $CI_REGISTRY_USER -p $CI_JOB_TOKEN $CI_REGISTRY
    - docker pull $IMAGE:wp-release || true
    - docker pull $IMAGE:web-release || true
    - docker pull $IMAGE:cron-release || true
    - docker build
      --cache-from $IMAGE:wp-release
      --tag $IMAGE:wp-release
      --file ./Dockerfile_wp.release
      "."
    - docker build
      --cache-from $IMAGE:web-release
      --tag $IMAGE:web-release
      --file ./Dockerfile_web.release
      "."
    - docker build
      --cache-from $IMAGE:cron-release
      --tag $IMAGE:cron-release
      --file ./Dockerfile_cron
      "."
    - docker push $IMAGE:wp-release
    - docker push $IMAGE:web-release
    - docker push $IMAGE:cron-release
Although our setup will have 4 services, the service db_blog is based on the standard MySQL image and we do not have to build a custom version of it. So, we only define the build for services wp_blog, web_blog, cron_blog. Their images will be created with the respective tags:
- :wp-release
- :web-release
- :cron-release
The image for the cron_blog service can be the same as in the local setup, so we re-use the file Dockerfile_cron that we created earlier.
The services wp_blog and web_blog will be built a bit differently for the live environment. Unlike in local, we will not bind the host directories as volumes to these services. We are not going to modify plugins or themes or the Nginx configuration on the fly for the running live containers. Instead, we are going to copy these files directly into the respective images.
So, the file Dockerfile_wp.release will have this content:
FROM wordpress:5.4.1-fpm-alpine
ENV WORDPRESS_DB_HOST: db_blog:3306
ENV WORDPRESS_DB_USER: $MYSQL_USER
ENV WORDPRESS_DB_PASSWORD: $MYSQL_PASSWORD
ENV WORDPRESS_DB_NAME: $DB_NAME

COPY ./wp-content/themes /var/www/html/wp-content/themes
COPY ./wp-content/plugins /var/www/html/wp-content/plugins
It will pull the WordPress image in the version we want to use, copy project variables into its environment variables, and, finally copy the project WordPress themes and installed plugins into the image file system.
The file Dockerfile_web.release has this content:
FROM nginx:1.15.12-alpine
COPY ./nginx-conf /etc/nginx/conf.d
RUN rm /etc/nginx/conf.d/default.conf
These instructions will pull the desired Nginx image and copy the configuration files from the project directory into the Nginx configuration folder. The default Nginx host configuration is deleted.
At this point, if you commit the changes to the master branch and push it to the origin, GitLab will automatically start a pipeline with a single job. If everything is fine, the job build:production will successfully finish:

Deploy Stage
In this stage, we define a process that will deploy the website to the remote server.
To the file .gitlab-ci.yml we add the job definition deploy
deploy:
  stage: deploy
  image: gitlab/dind:latest
  only:
    - "master"
  services:
    - docker:dind
  before_script:
    - mkdir -p ~/.ssh
    - echo "$DEPLOY_SERVER_PRIVATE_KEY" | tr -d '\r' > ~/.ssh/id_rsa
    - chmod 600 ~/.ssh/id_rsa
    - eval "$(ssh-agent -s)"
    - ssh-add ~/.ssh/id_rsa
    - ssh-keyscan -H $DEPLOYMENT_SERVER_IP >> ~/.ssh/known_hosts
  script:
    - printf "VIRTUAL_HOST=${VIRTUAL_HOST}\nLETSENCRYPT_HOST=${LETSENCRYPT_HOST}\nMYSQL_ROOT_PASSWORD=${MYSQL_ROOT_PASSWORD}\nMYSQL_USER=${MYSQL_USER}\nMYSQL_PASSWORD=${MYSQL_PASSWORD}\nDB_NAME=${DB_NAME}" > .env
    - ssh $DEPLOYMENT_USER@$DEPLOYMENT_SERVER_IP "mkdir -p ${APP_PATH}/db_dump"
    - ssh $DEPLOYMENT_USER@$DEPLOYMENT_SERVER_IP "mkdir -p ${BACKUP_TARGET}"
    - scp -r ./.env ./docker-compose-gitlab.yml ./docker-entrypoint.sh ${DEPLOYMENT_USER}@${DEPLOYMENT_SERVER_IP}:$APP_PATH/
    - ssh $DEPLOYMENT_USER@$DEPLOYMENT_SERVER_IP "cd ${APP_PATH};
      sudo docker login -u ${CI_REGISTRY_USER} -p ${CI_REGISTRY_PASSWORD} ${CI_REGISTRY};
      sudo docker pull ${CI_REGISTRY}/${CI_PROJECT_PATH}:wp-release;
      sudo docker pull ${CI_REGISTRY}/${CI_PROJECT_PATH}:cron-release;
      sudo docker pull ${CI_REGISTRY}/${CI_PROJECT_PATH}:web-release;
      sudo docker-compose -f docker-compose-gitlab.yml stop cron_sa;
      sudo docker-compose -f docker-compose-gitlab.yml stop wp_sa;
      sudo docker-compose -f docker-compose-gitlab.yml stop web_sa;
      sudo docker-compose -f docker-compose-gitlab.yml rm -f cron_sa;
      sudo docker-compose -f docker-compose-gitlab.yml rm -f web_sa;
      sudo docker-compose -f docker-compose-gitlab.yml rm -f wp_sa;
      sudo docker volume rm ${CI_PROJECT_NAME}_wordpress;
      sudo docker-compose -f docker-compose-gitlab.yml up -d --build;
      sudo docker-compose -f docker-compose-gitlab.yml exec -T wp_sa sh -c \"chown -R www-data:www-data /var/www/html/wp-content/uploads\""
The deployment will proceed like this:
- The GitLab job’s script will create a temporary container that will be used to connect to the target server via SSH
- The script copies a private key (from the project settings) into the temporary container and sets up the ssh-agent to use it when connecting to the remote server.
- The script creates a file called
.envand writes the following variables with values taken from the project settings:VIRTUAL_HOST– the hostname that resolves to the remote server IP and will be used for the future website, e.g.www.mysite.ioLETSENCRYPT_HOST– the same hostname that will be used to request a Letsencrypt certificate for, e.g.www.mysite.ioMYSQL_ROOT_PASSWORD,MYSQL_USER,MYSQL_PASSWORD,DB_NAME– the values for these we have already defined in the project variables
- The files
.env,docker-entrypoint.sh, anddocker-compose-gitlab.ymlare copied to the remote server. The filedocker-entrypoint.shis the same one we defined for the local environment. We will look into the content of thedocker-compose.ymlin a moment.
- The script creates directories for the database initialization (
db_dump) and for the daily database backups (db_backup_daily). - Then, the script will pull the latest image builds for the services wp_blog, web_blog, and cron_blog.
- After the images are pulled, the script will stop the three services and remove the created containers. Note that the container for the db_blog that runs the MySQL database is not stopped and remains the same. Unless you explicitly want to change the image version of this container, you should not destroy and recreate it. Even with an empty blog database, it can take up to a minute for this container to accept connections at which time your website will not be accessible (other services can be restarted in seconds).
- The
wordpressvolume that after the creation is labeled${CI_PROJECT_NAME}_wordpressis removed. This is done so that changes in the files of the core WordPress (platform updates), in the plugins (plugin updates), or in your theme (whatever modifications you did) can be taken over into the new version of the containers. - Then the script runs the command to start the stopped services and rebuild the containers.
- Finally, a command is run to change the file ownership of the
uploadsfolder to the web server user so that files can be uploaded without permission errors.
To enable the GitLab script to connect to the remote server, create a key pair and save the private key as the project variable DEPLOY_SERVER_PRIVATE_KEY. Add the public key to the file./ssg/authorized_keys in the home folder of the user that you will use to connect to the remote server.
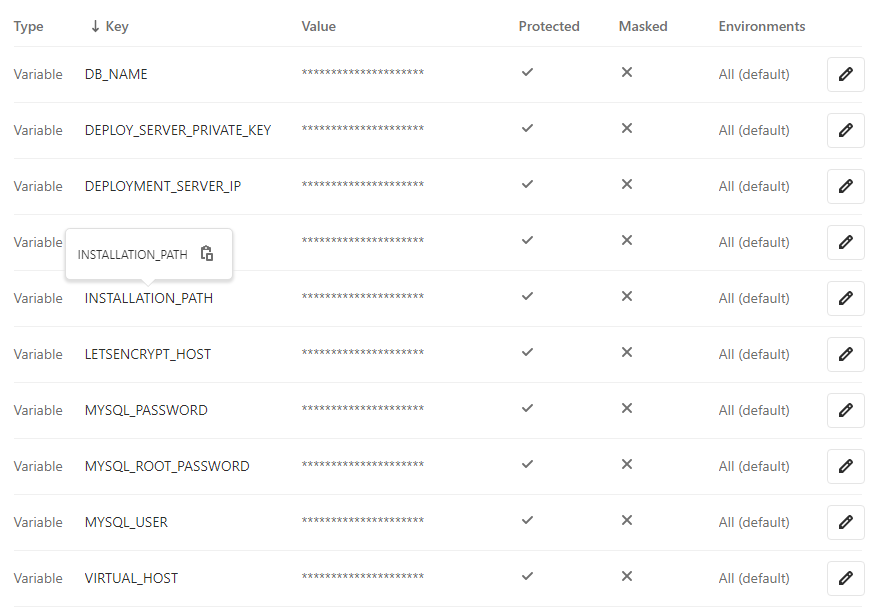
Other project variables that we need to add are:
DEPLOYMENT_USER– the name of the user you will use to connect to the remote server and whose private key is saved as theDEPLOY_SERVER_PRIVATE_KEYDEPLOYMENT_SERVER_IP– IP address of the remote serverVIRTUAL_HOST– hostname of the future websiteLETSENCRYPT_HOST– hostname to get a Let’s Encrypt certificate for
The complete list of the project variables is finally this:
File docker-compose-gitlab.yml
This file is used by the GitLab script to build and start the containers in the live environment.
Let’s see briefly the four services it describes. Thus, the live version of the db_blog service is defined like this:
db_blog:
    image: mysql:8.0
    container_name: db_blog
    restart: unless-stopped
    env_file: .env
    environment:
      MYSQL_ROOT_PASSWORD: $MYSQL_ROOT_PASSWORD
      MYSQL_USER: $MYSQL_USER
      MYSQL_PASSWORD: $MYSQL_PASSWORD
      MYSQL_DATABASE: $DB_NAME
    volumes:
      - dbdata:/var/lib/mysql
      - ./db_dump:/docker-entrypoint-initdb.d
    command: '--default-authentication-plugin=mysql_native_password'
    networks:
      - app-network
The difference to the local definition is the absence of the host port mapping. Opening a port to the outside is a security issue.
The wp_blog live definition is this:
 wp_blog:
    depends_on:
      - db_blog
    image: registry.gitlab.com/varinen/wordpress-blog-with-gitlab-ci-cd:wp-release
    container_name: wp_blog
    restart: unless-stopped
    env_file: .env
    environment:
      WORDPRESS_DB_HOST: db_blog:3306
      WORDPRESS_DB_USER: $MYSQL_USER
      WORDPRESS_DB_PASSWORD: $MYSQL_PASSWORD
      WORDPRESS_DB_NAME: $DB_NAME
    volumes:
      - ./wp-content/uploads:/var/www/html/wp-content/uploads
      - wordpress:/var/www/html
    networks:
      - app-network
In the live environment, we will use our custom image that will be pulled from the GitLab registry. We also bind the wp-content/uploads volume to the host to persist the uploaded files.
The live definition of the web_blog service is this:
web_blog:
    depends_on:
      - wp_blog
    image: registry.gitlab.com/varinen/wordpress-blog-with-gitlab-ci-cd:web-release
    container_name: web_blog
    restart: unless-stopped
    expose:
      - 80
    volumes:
      - ./wp-content/uploads:/var/www/html/wp-content/uploads
      - wordpress:/var/www/html
    networks:
      - app-network
      - nginx-proxy
    environment:
      VIRTUAL_HOST: $VIRTUAL_HOST
      LETSENCRYPT_HOST: $LETSENCRYPT_HOST
Here, we too use a custom image built in the release stage. Note that this container receives $VIRTUAL_HOST and $LETSENCRYPT_HOST environment variables. These will be picked up by the nginx-proxy and the letsencrypt_proxy_companion to automatically create a virtual host config and to request a Let’s Encrypt certificate when the web_blog container is created.
The live configuration of the cron_blog service is the same as in the local environment with the only difference being the use of a custom image:
cron_blog:
    depends_on:
      - db_blog
    image: registry.gitlab.com/varinen/wordpress-blog-with-gitlab-ci-cd:cron-release
    entrypoint: ['/var/scripts/cron_entrypoint.sh']
    container_name: cron_blog
    restart: unless-stopped
    env_file: .env
    volumes:
      - ./db_backup_daily:/var/backup/db
    networks:
      - app-network
The complete file .gitlab-ci.yml is then this:
version: "3"

services:
  db_blog:
    image: mysql:8.0
    container_name: db_blog
    restart: unless-stopped
    env_file: .env
    environment:
      MYSQL_ROOT_PASSWORD: $MYSQL_ROOT_PASSWORD
      MYSQL_USER: $MYSQL_USER
      MYSQL_PASSWORD: $MYSQL_PASSWORD
      MYSQL_DATABASE: $DB_NAME
    volumes:
      - dbdata:/var/lib/mysql
      - ./db_dump:/docker-entrypoint-initdb.d
    command: '--default-authentication-plugin=mysql_native_password'
    networks:
      - app-network

  wp_blog:
    depends_on:
      - db_blog
    image: registry.gitlab.com/varinen/wordpress-blog-with-gitlab-ci-cd:wp-release
    container_name: wp_blog
    restart: unless-stopped
    env_file: .env
    environment:
      WORDPRESS_DB_HOST: db_blog:3306
      WORDPRESS_DB_USER: $MYSQL_USER
      WORDPRESS_DB_PASSWORD: $MYSQL_PASSWORD
      WORDPRESS_DB_NAME: $DB_NAME
    volumes:
      - ./wp-content/uploads:/var/www/html/wp-content/uploads
      - wordpress:/var/www/html
    networks:
      - app-network

  web_blog:
    depends_on:
      - wp_blog
    image: registry.gitlab.com/varinen/wordpress-blog-with-gitlab-ci-cd:web-release
    container_name: web_blog
    restart: unless-stopped
    expose:
      - 80
    volumes:
      - ./wp-content/uploads:/var/www/html/wp-content/uploads
      - wordpress:/var/www/html
    networks:
      - app-network
      - nginx-proxy
    environment:
      VIRTUAL_HOST: $VIRTUAL_HOST
      LETSENCRYPT_HOST: $LETSENCRYPT_HOST

  cron_blog:
    depends_on:
      - db_blog
    image: registry.gitlab.com/varinen/wordpress-blog-with-gitlab-ci-cd:cron-release
    entrypoint: ['/var/scripts/cron_entrypoint.sh']
    container_name: cron_blog
    restart: unless-stopped
    env_file: .env
    volumes:
      - ./db_backup_daily:/var/backup/db
    networks:
      - app-network

volumes:
  dbdata:
  wordpress:

networks:
  app-network:
    driver: bridge
  nginx-proxy:
    external: true
Preparing the Deployment
On the remote server, create the path that corresponds to your values of variables $INSTALLATION_PATH / $CI_REGISTRY / $CI_PROJECT_PATH (in my example, /var/apps/registry.gitlab.com/registry.gitlab.com/varinen/wordpress-blog-with-gitlab-ci-cd). Make sure that the owner of this destination is the user that the deploy script will be running under.
Optionally, in that destination create a sub-directory wp-content/uploads and move there the media files you might have if this is a migration project. Also, in the case of a migration project, create a sub-directory db_dump and place there the database dump file (.sql or .sql.gz) and the update file z_update.sql. This update file will have this content (replace the string www.mysite.io with your hostname):
update wp_options set option_value = "https://www.mysite.io" where option_name in ('siteurl', 'home')
The remote server will have to allow the deployment to use passwordless sudo execution of docker and docker-compose commands. This is done by creating a file {$username} under /etc/sudoers.d/, e.g. for the user myuser(/etc/sudoers.d/myuser)
-rw-r--r-- 1 root root 78 May 15 17:34 myuser
This file will have this content:
myuser ALL=(root) NOPASSWD: /usr/bin/docker, /usr/local/bin/docker-compose
Starting the Deployment
By default, the CI / CD pipeline will start automatically when new content is pushed to the branch master. So, commit your changes to the branch master and push it to the origin. Open your project in GitLab and navigate to “CI / CD” / “Pipelines”. If everything is fine, your jobs will successfully finish and the pipeline status will be “Passed”:
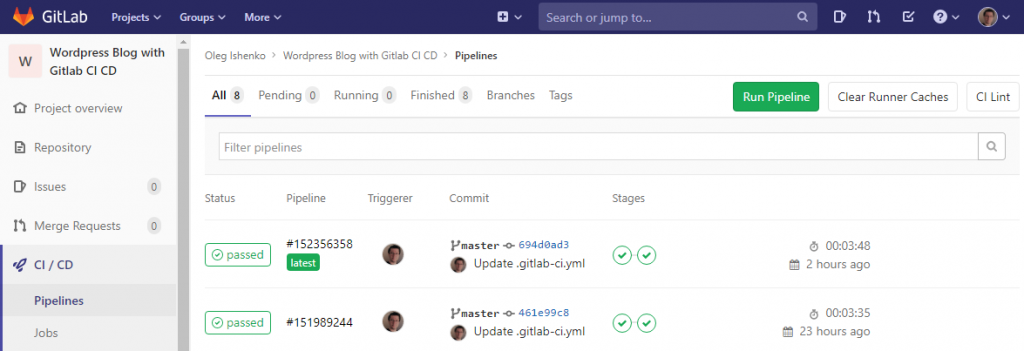
If there was a problem, investigate the job logs. Alternatively, if the deploy job has advanced far enough to copy the docker-compose-gitlab.yml file to the application path, log into your remote server, change into the project directory and inspect the logs of the problem services with sudo docker-compose -f docker-compose-gitlab.yml logs <service_name> command.
1 Comment
PhpStorm: Using Xdebug for WordPress Development in Docker - Singular Aspect · June 9, 2020 at 3:46 pm
[…] Once the project is ready for deployment, you will have to work out a way to bring the theme modifications to the production environment. The volume mapping we used in the docker-compose service configuration will not be necessary for a live container so you may need to create a Docker file for the production version. You can find more information on deployment Deploy Containerized WordPress Websites with GitLab and Nginx-Proxy […]